DJI Mavic 2 Pro Review
I love aerial photography. Having a drone opens up a whole new world of images, compositions and creative prospects. I have owned the following drones:
Dji Spark
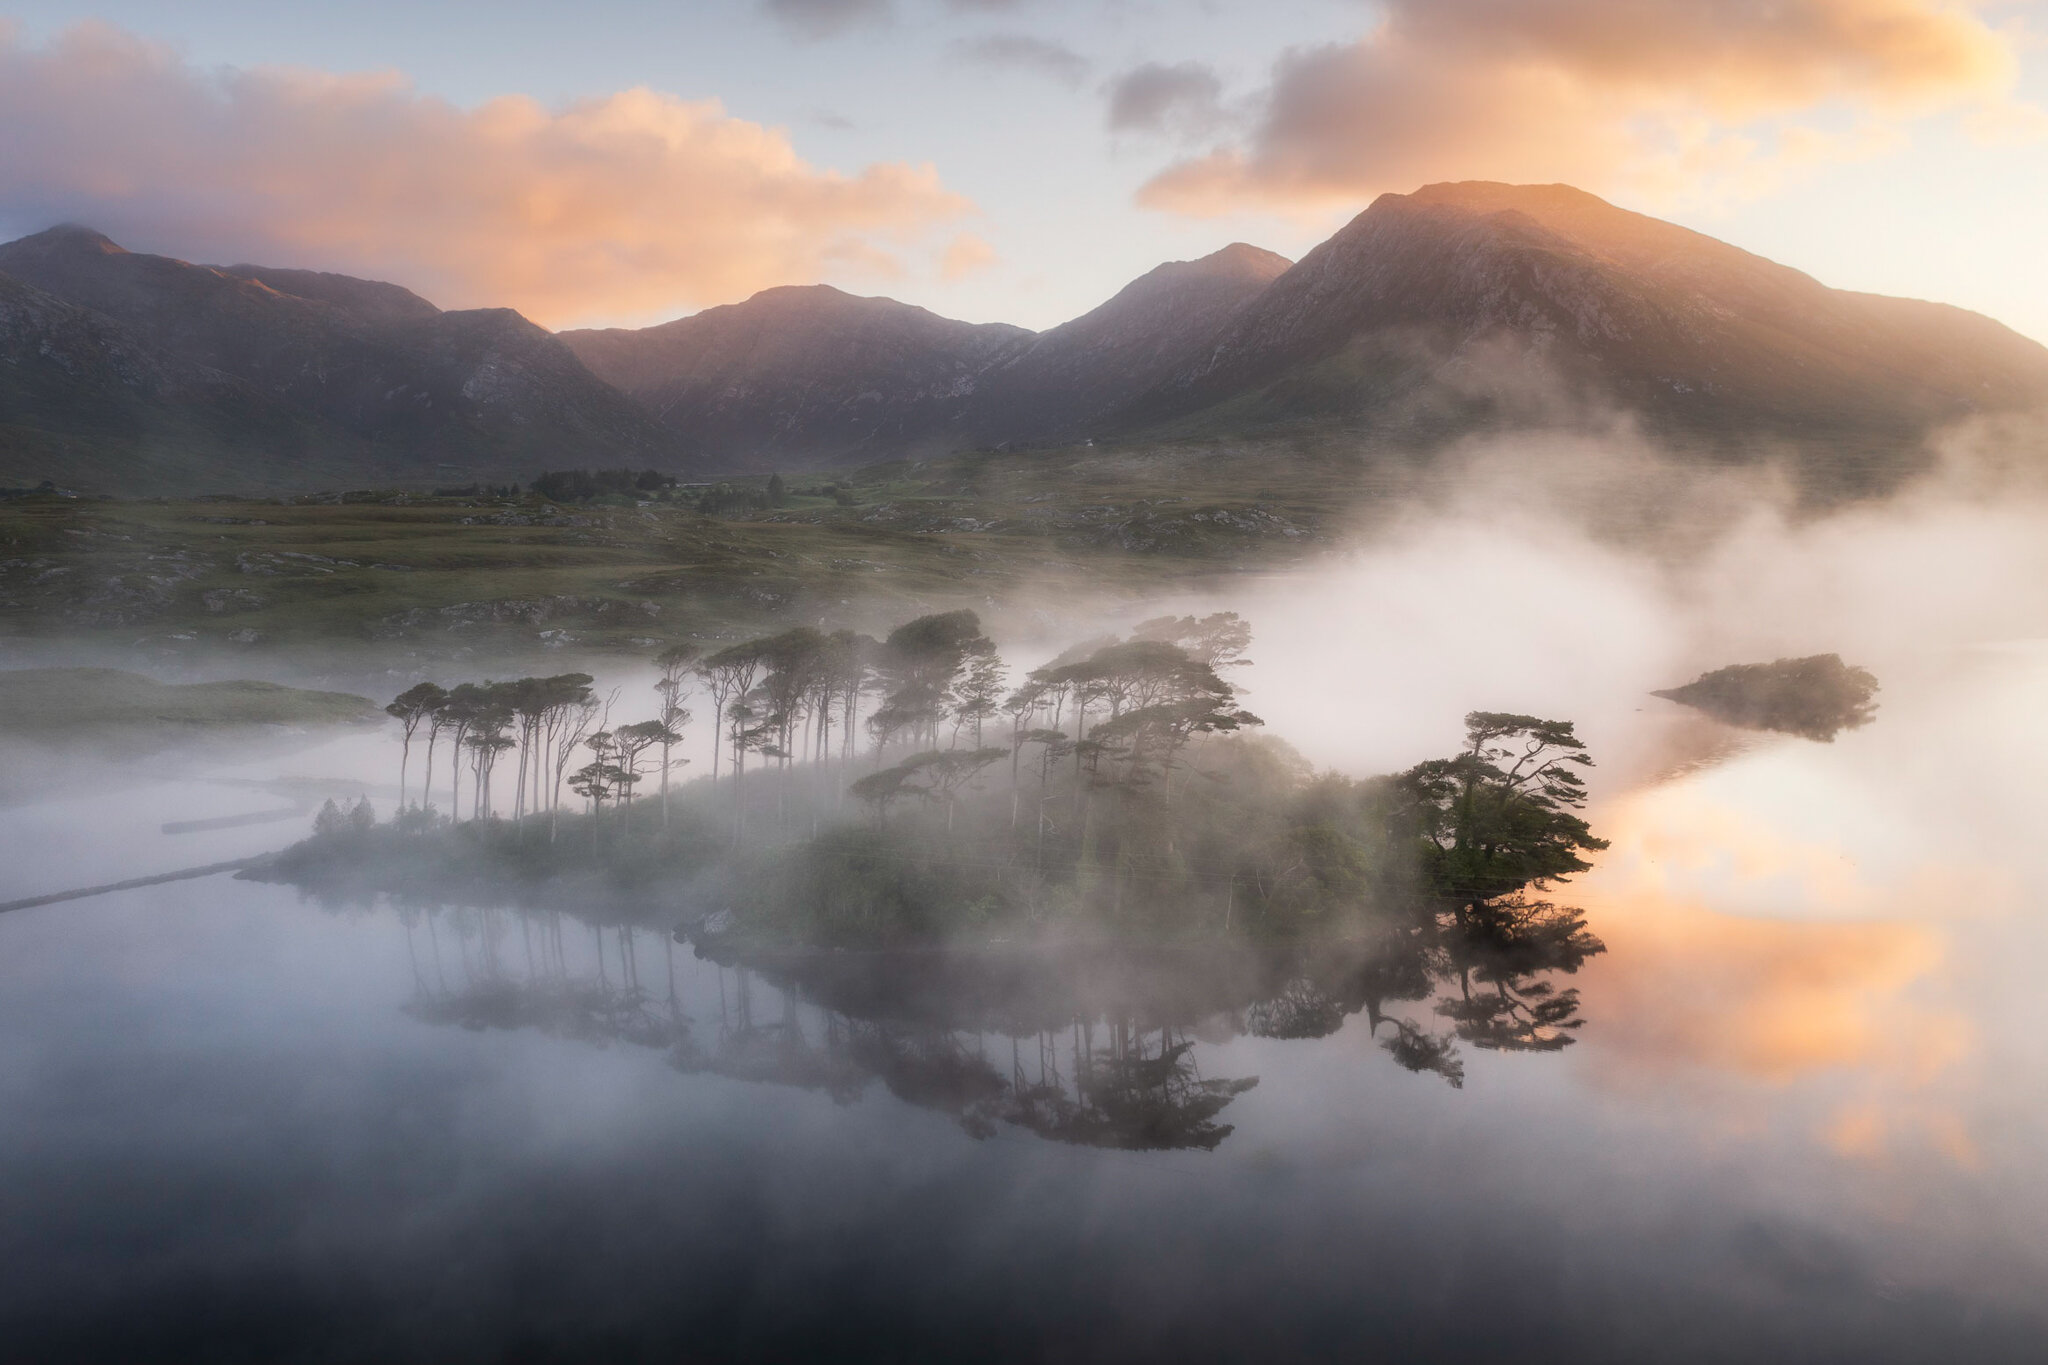
Even at 20 meters, Drones can give iconic locations new perspectives
Dji Mavic Pro
Dji Mavic Pro 2
I can confidently say that if you want a drone stay well away from the Spark, I’m not sure they even sell it anymore but I do know you can find it on the second hand market. If you want a small drone, check out the mavic mini 2.
This review is about the Mavic Pro 2. This will not be a very technical scientific review, there are lots of pages and youtube channels who go through that. This is an honest review from a Landscape Photographer using this drone for both photo and video. Hopefully this blog may help you make up your mind on whether or not this drone is for you.
Why I chose the Mavic Pro 2 over the Phantom Models:
I like to hike. It really is as simple as that. I hike a lot and the prospect of getting aerial footage and images from the peaks of mountains ranges like the Reeks in Co Kerry or the 12 Bens in Connemara here in Ireland was too tempting to turn down. Would I be able to haul a Phantom 4 pro along with my camera gear and possibly camping gear up the side of a mountain? No way. In my Tenba BYOB 10 ICU I can hold: Nikon Z6 with 24-70 F4 attached, Mavic Pro 2 drone, controller and two batteries, 70-300 Lens along with FTZ adapter, camera batteries and lens cloths. All that in a small compact ICU measuring 26.7 x 11.4 x 20.3 cm. Magic
The 1 Inch sensor. This is vastly improved over the originally Mavic Pro. I’ll get to the noise performance later in the next section but I’ve found the dynamic range really is excellent. My advice would be to expose for the shadows and the midtones and leave the highlights relatively exposed. Increasing shadows in post introduces a lot of noise and the highlights are well capable of being pulled back.

ISO 400, F4. This image is noisier than I would like.
Is this drone a capable tool for aerial photography?
Yes, once you know the right times to shoot and some post processing knowledge. I use my drone extensively during the golden hour, its the perfect balance between there being a lot of available light to work with but also light that isn’t too harsh. I have shot with the drone pre-dawn at ISO 400 and I was not too impressed with the noise performance. Maybe I done something wrong but I would be sticking to ISO 100 and use the drone during the times you may not be shooting with your camera for example during the golden hour, daytime, basically when there is lots of light available. A drone can turn a typical daytime shot into a really strong image, even though daytime isn’t always seen as a good time to produce images with a camera.
Raw files have lots of data to work with and even though you will see more noise than you may be accustomed to from your DSLR or Mirrorless camera, it is perfectly acceptable. I have seen images printed from the Mavic Air 2 in A2 size and they looked stellar so I can imagine Mavic Pro 2 images will print just fine. To try minimise any noise in my shots I will exposure blend however I have found that I don’t need to do this as much as I used to with the original Mavic pro. A lot of image degradation actually occurs during the post processing stage unknown to the photographer who then possibly blame the equipment. Colour rendition is very good, some times slightly partial to the green hues but this is easily corrected. Images are sharp and well balanced. I do miss the ability to flip the camera and shoot vertical orientation like on the old Mavic pro, that was a nice feature. But the perks of the larger sensor outweigh that downside. Vertical pano’s are easily done and we can crop in post to suit.
Variable Aperture:
This is a big deal for both photo and video. For video it means we may not need ND filters all the time in order to reduce the amount of light entering the sensor, helping us to get the right shutter speed in relation to our frame rate. For photo it means we have a larger depth of field which is brilliant. Just a word of caution, don’t shoot above F5.6, the aperture ranges from F2.8 to F11 and i’ve found the sweet spot is F4-F5.6. Depth of field may not be as important as shooting a landscape image on the ground where you often have prominent features in your foreground, middle and background. But it is still nice to have the option to stop down and not be stuck at F2.8. Anything above F5.6 I have found is soft so avoid F8 or F11 if at all possible.
Focal Length:
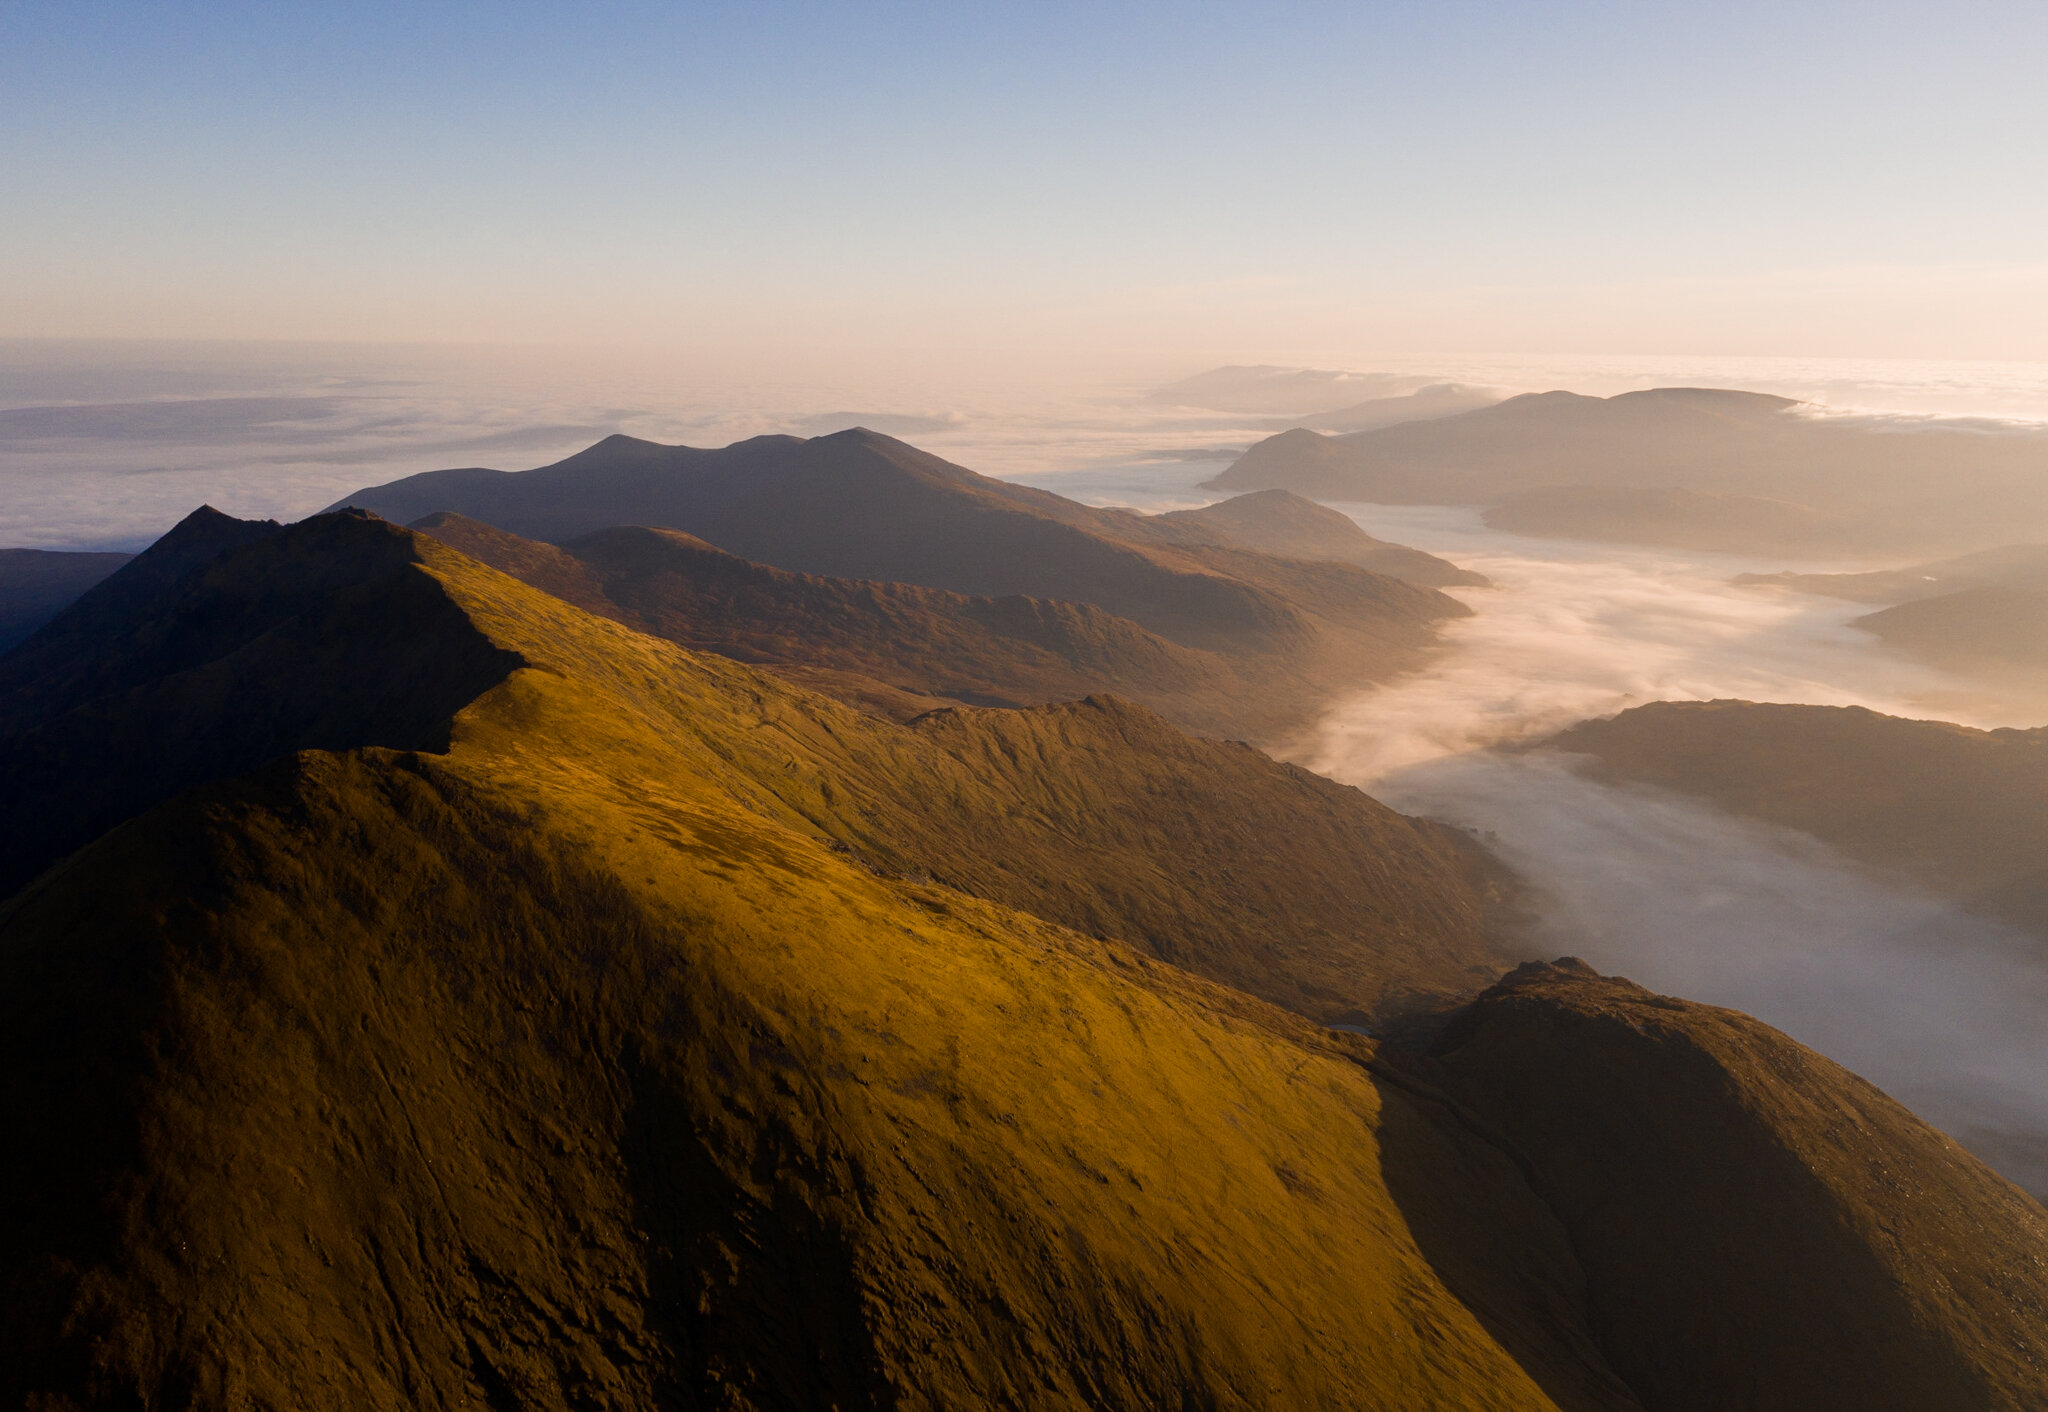
F5.6, ISO 100. Single Exposure
Something you may be interested in is the focal length. The Mavic 2 has a fixed focal length of 28mm, this may seem narrow for landscapes and yes I have shot more pano’s with this drone than previous drones which have a 24mm FOV but this hasn’t hindered me and if anything the 28mm creates a more dynamic landscape image with more compression which works really well when shooting mountains.
Connectivity:
Connectivity is excellent along with range. Once there are no major obstacles between you and the drone you’re golden. Flight time is good, i’ve mostly been flying it in colder weather but still getting 18-20 minutes out of it. I was plagued with lost connection issues on the previous drone but I’m happy to report these are non existent with the Mavic 2.
Video:
I love the 4k and 2k video on this drone. I always shoot in either of these resolutions and downres to 1080p. I shoot predominately in 60fps or 24fps and it works really work. Dynamic range is excellent and the D-log profile allows me to colour grade the footage to my liking. Overall, this is a video tool that will open up your creativity and make you fall in love with film making. There is a tripod mode which slows the drone right down and helps if you’re flying close to obstacles or trying to get that slow pan through the woodland while also trying not to crash the drone! Gimbal speed can be altered helping your cinematic gimbal movements. Overall I have no issues with the video on this drone and I am very excited about the possibilities it will open up for me as a film maker.
Heres a video I shot and put together taken on the drone
The Controller:
The controller is still largely unchanged since the original Mavic pro. It does now allow you to unscrew the joysticks which is good as I often feared they would break while attached to the controller however If you do not firmly store them into the base of the controller you may lose them! I love the controller on the Mavic Air 2 and I wished DJI had gone for this style controller with the Pro 2. The handles feel stiff opening them up, the process of connecting the phone via the cable and slotting it into the controller handles is cumbersome and on cold days it can be a challenge especially if you’re wearing gloves! But I’m really knit picking here, I’ve gotten used to it and you will too.
Wind Handling:
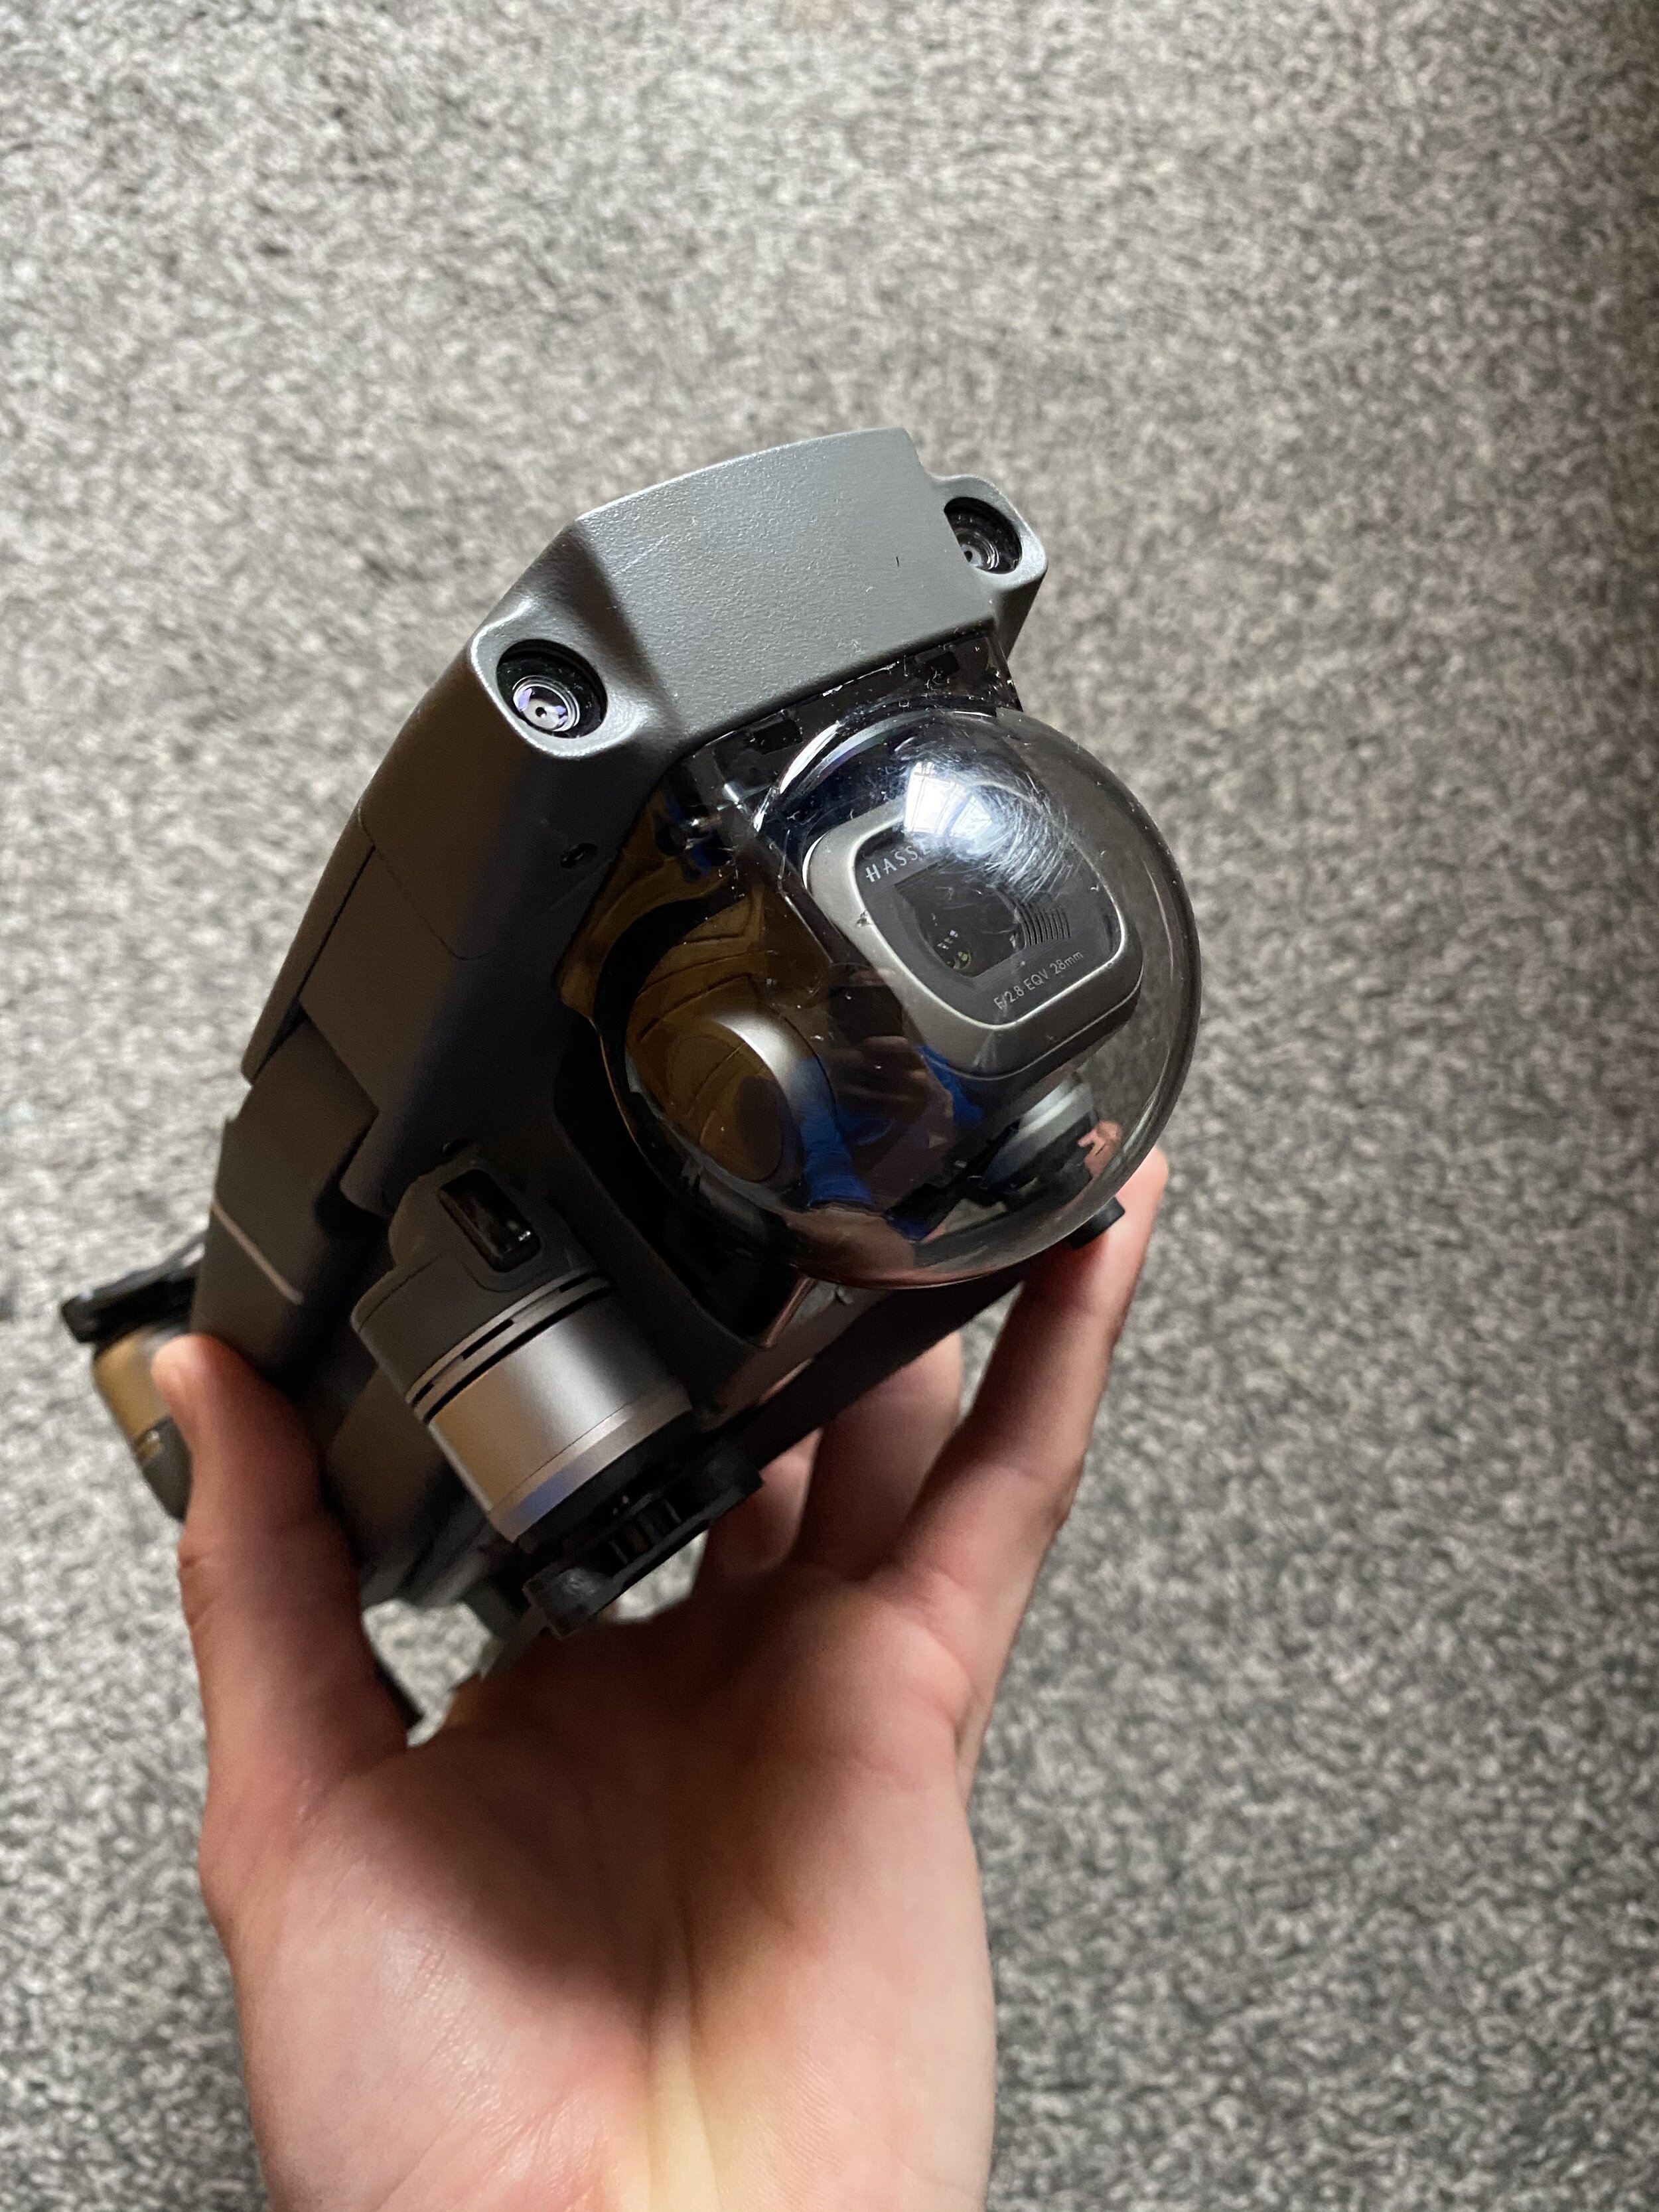
Very quick note here, it handles wind really well. Even with the drone moving or shaking a bit the gimbal compensates for that and your footage stays quite stable. I have flown this drone through freezing fog and was quite alarmed when I saw ice on the props after landing but it was no issue at all. Also the new gimbal cover is excellent, it acts as both a clamp and a protective cover for your drone where as on the original Mavic Pro the gimbal clamp was a separate piece of plastic which I stupidly discarded on day 1.
Here are a few sample images I have shot with the Mavic 2 Pro over the past few months. I hope you enjoyed this blog and if you have any questions let me know.
Thanks for reading!
If this article helped you in any way and you enjoyed it please consider supporting me via the donation link below. Thank you :-)

3 shot vertical pano, Beautiful Colour rendition and DR

Wind Farm in my local area. F5.6, ISO 100, One image split into two using virtual copies, one processed for Shadows and Midtones, the other for highlights and blended in photoshop
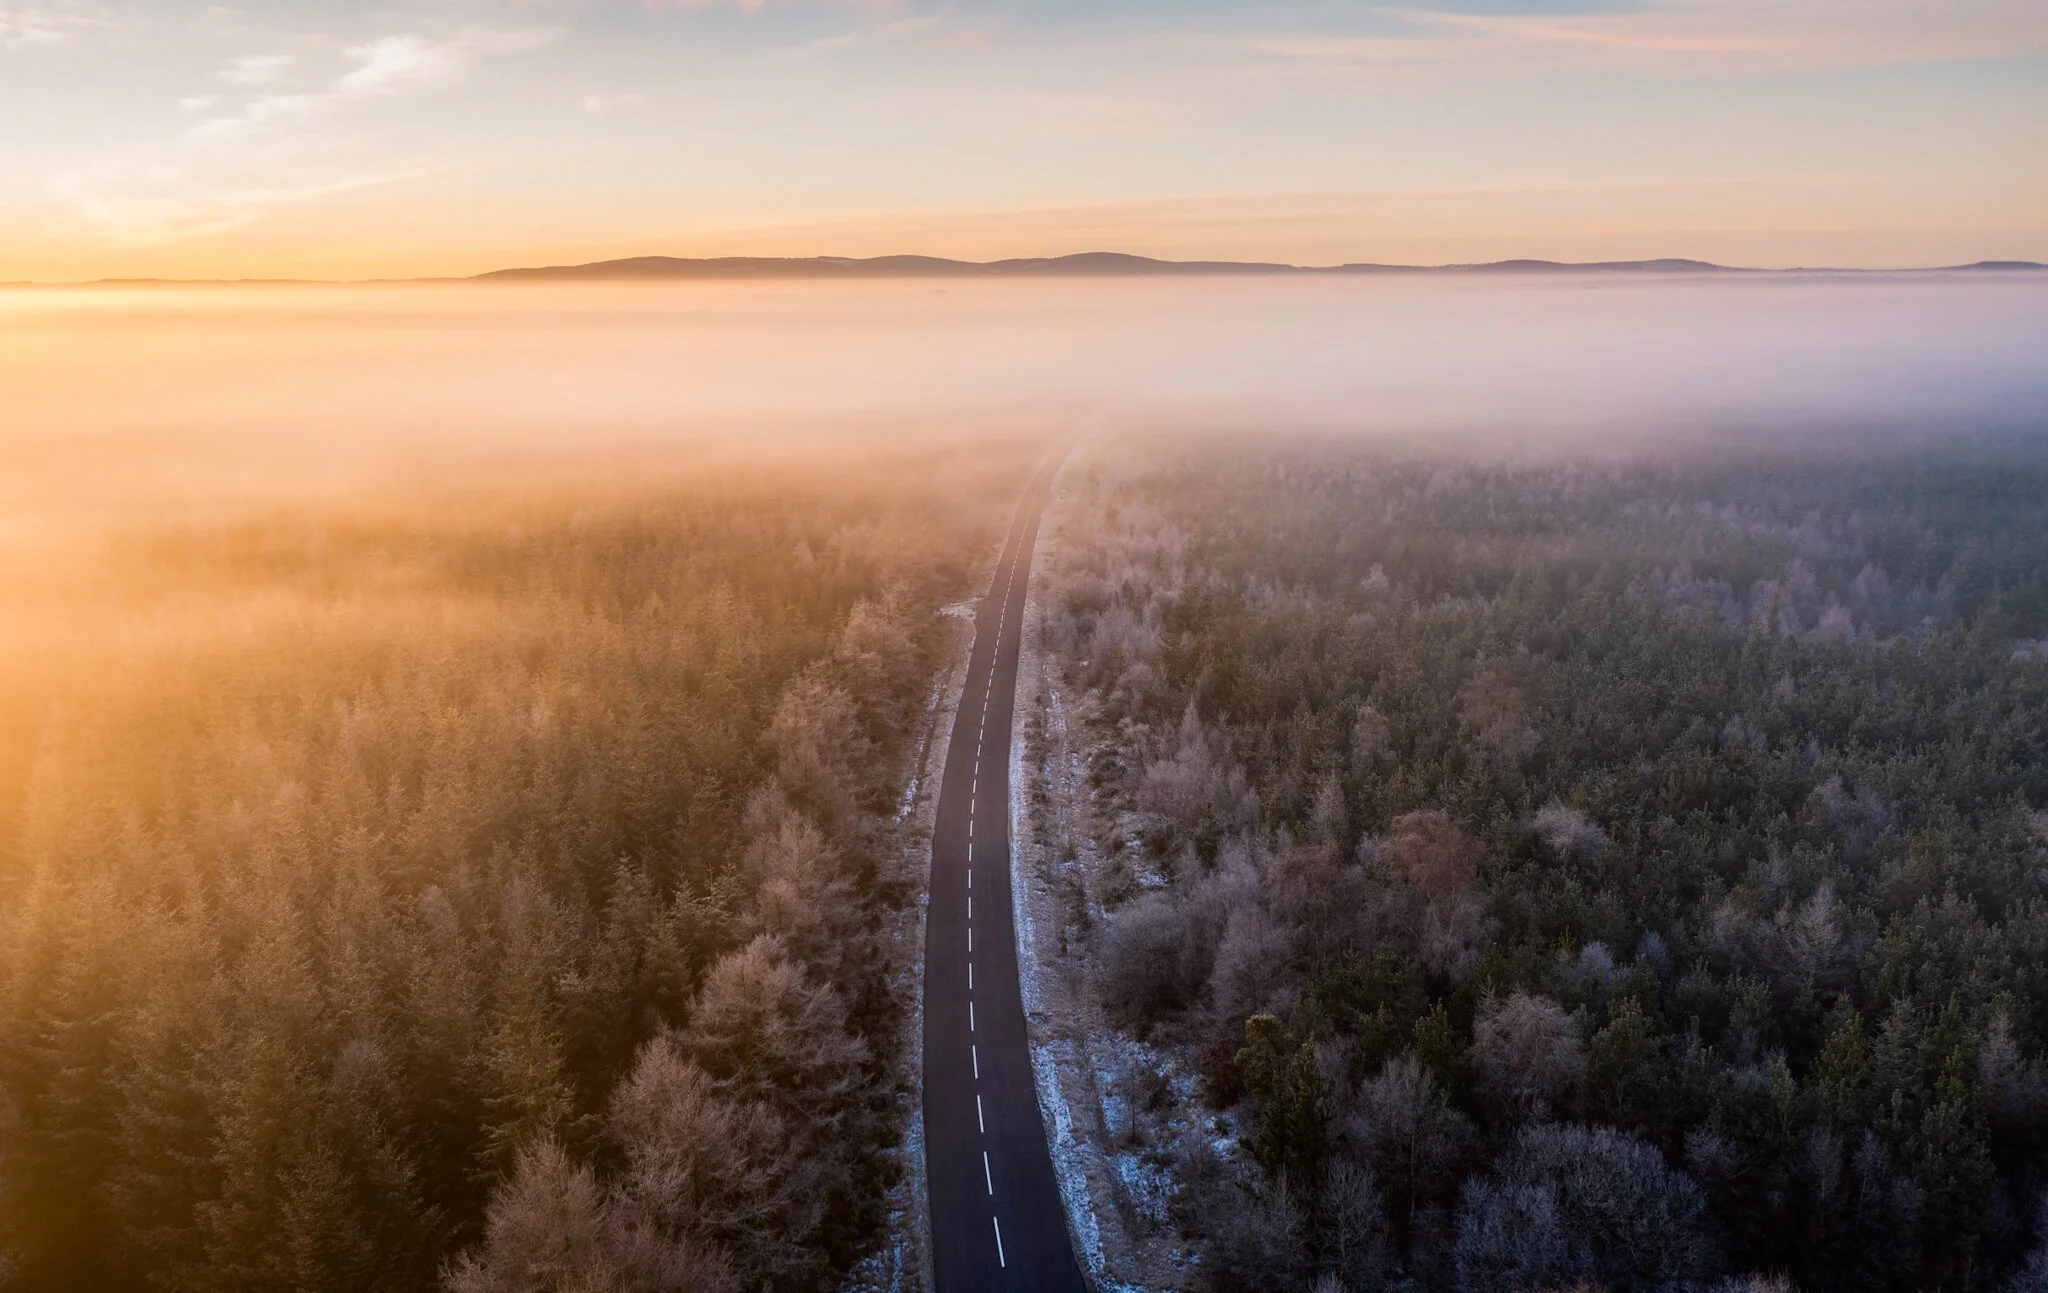
Road to the fog. The golden hour is perfect for drone photography. F4, ISO 100. Same blending process as the previous image.